Is eating healthier a part of your 2021 plans? This must be one of the most common New Year resolutions! Whether this is on your yearly goals list or you are just an avid green thumb looking for a fun gardening project, microgreens are an easy nutrition-packed project you can do indoors since they require little space!
Do you have one of our Edible/Culinary Seeds Sets or Starter Kits? This is an excellent project if you have extra culinary seeds, are limited to growing space, or want to try something new!
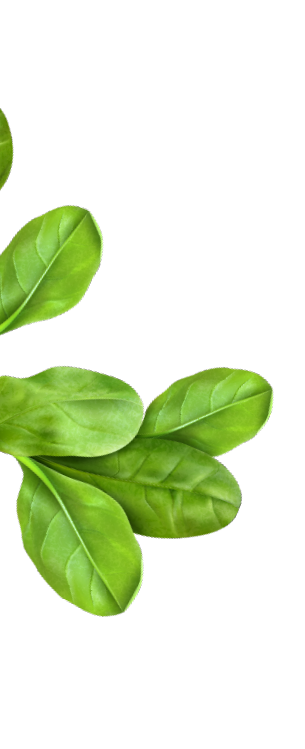
What exactly are Microgreens?
In case you were wondering, there is a slight difference between a "sprout" and a "microgreen"! A sprout is the very first set of baby leaves that pop up out of the seed after germination. These first two sets of leaves are called "cotyledons" and are part of the embryo within the plant's seed. Cotyledons provide start-up fuel to give the tiny sprouts a burst of energy for the real leaves to develop. Isn't nature so amazing?!
"Microgreens" is a sprout's next stage of development, which is producing its first set of true leaves( the next set after the cotyledons). They are considered a superfood as at this stage, they are loaded with all kinds of nutrients. The more seeds varieties you plant, the more types of nutrients you will be putting in your body. In general, they are much more nutrient-dense than their mature form that we usually grow. It's almost like growing your own vitamins!
Uses
Microgreens can be used to top or add to a large variety of culinary dishes! From sandwiches, salads, omelets, appetizers, meat dishes, pizza, and pasta plates, to name a few. Basically, anything you want to add some fresh greens to!

What kind of seeds should and shouldn't I use?
Many edible plant species can be used to grow microgreens! Leafy greens, salad green, herbs, edible flowers, the broccoli family (Brassicaceae), grains, and legumes!
Veggies in the nightshade family, such as potatoes, tomatoes, peppers, and eggplants, should NOT be grown. They are high in alkaloids, which are not so great for your digestive and nervous system! You also want to make sure to buy non-GMO and organic seeds as you don't want to be putting dangerous chemicals into your body!
What do I need?
You don't need anything fancy to get started growing! You'll need:
- Seeds: It's best to keep the seeds varieties separated or make sure they have the same germination requirements (days to germination, soil temperature, light requirements). Our Culinary Herb Seed Set and Herbal Tea Seed Sets are the perfect picks for seed selection as they have 10 varieties!
- Growing trays/containers: You don't need anything fancy. Just make sure they have drainage holes in the bottom. You can find microgreen specific trays online.
- Growing medium: Make sure you get seed starting specific soil or mat. Most of these will be peat or coconut coir based. You don't want to use garden soil, potting soil, raised bed soil, etc.
- Water: (distilled/filtered is best)
- Spray bottle: Make sure you get one with a misting option!
- Plant food: Get something low in nitrogen and high in micronutrients. Our favorite is Superthrive.
-
Light source: Once they have sprouted, they will need 6-8 hours of sunlight. If you don't get enough sunlight, you will need to purchase a full-spectrum grow light.

Growing your microgreens:
- You will want to start by filling your trays with the soil/growing medium. Very lightly pack it down. You don't want it to be too compacted!
- Wet the soil! You can do so by using the spray bottle or setting the tray in some water and letting it soak up through the drainage holes. You don't want the soil to be too wet and swampy, just moist.
- Spread the seeds out evenly across the surface of the soil. Very lightly press the seeds into the soil, or cover with a thin layer of soil. Basically, this is to keep the seeds from moving around when you water.
- Mist the seeds daily or however much is needed to keep the soil from completely drying out. Remember, soggy soil is just as bad as dry soil!
Once they have germinated ( can be anywhere from a couple of days to a few weeks, depending on variety), you will want to give the light! 6-8 hours should be perfect, but check the seed packet to double-check. If your sprouts are looking pale and lanky, they need more light!
You will most likely need to mist twice a day at this point. When they have sprouted, it's good to give them light dilution of plant food to provide them with even more nutrients!

Harvest Time!
Once they have produced their first set of real leaves, it's time to harvest! Use a sharp pair of scissors or a knife to cut the greens right above soil level. Wash your microgreen before use. It's best to use them immediately after cutting them as they are young and tender and don't have a long shelf life. If you need to use them later, avoid washing them and storing them in the fridge. You can then wash them as you use them.
If you still need to purchase seeds, check out our Culinary Herbs Seed Set and our Herbal Tea Seed Set. Our 4-variety starter kits such as the Edible Flowers Starter Kit , Herbs in the Burbs Starter Kit, Rainbow Salad Starter Kit, and Herbal Tea Starter Kit will work as well!
Happy Sprouting!